When you are remodeling your kitchen, choosing the right countertop is one of the most critical decisions you will need to make. We have a comprehensive guide on affordable countertop options for kitchen remodeling.
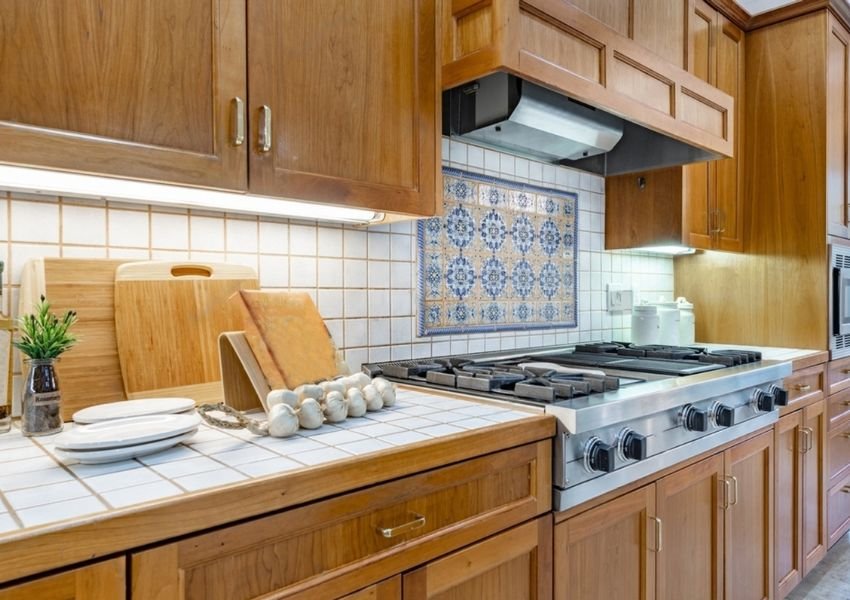
Among the array of options available, tile countertops have emerged as a versatile and budget-friendly choice that brings a touch of timeless elegance to any kitchen space.
Tiles are one of the most effective countertop solutions. They are affordable, versatile, and durable, making them a compelling choice for homeowners who seek an appealing and budget-conscious solution for their kitchen upgrades.
Pros of Tile Countertops
- Design Diversity: Tile countertops offer an extensive range of materials, colors, patterns, and textures, allowing for endless customization to match any kitchen style.
- Affordability: Among the several options available for Kitchen Countertops, you will find tiles to be one of the most affordable ones.
- Heat Resistance: Tiles are highly resistant to heat, making them an ideal surface for placing hot pots and pans without the risk of damage.
- Moisture Resistance: Tiles are naturally resistant to moisture and water, reducing the risk of stains and water damage.
- Easy Cleaning: The smooth and non-porous surface of tiles makes them easy to clean and maintain. Spills, stains, and splatters can be wiped away effortlessly.
- Durability: High-quality tiles are durable and long-lasting, standing up well to daily wear and tear in a busy kitchen environment.
- DIY-Friendly: Tile installation can be a manageable DIY project for homeowners with some basic skills, allowing them to personalize their space without extensive professional assistance.
- Repairability: In the event of damage to individual tiles, they can be replaced without needing to replace the entire countertop, reducing repair costs.
- Visual Appeal: Tile countertops can create eye-catching focal points in kitchens, enhancing the overall aesthetic appeal and value of the space.
- Customization: Tiles can be arranged in intricate patterns and designs, offering creative opportunities to express unique style preferences.
Cons of Tile Countertops
- Grout Maintenance: The grout lines between tiles require regular cleaning and maintenance to prevent staining, discoloration, and the growth of mold or mildew.
- Susceptibility to Chipping: Tile edges and corners can be vulnerable to chipping or cracking, especially if heavy objects are accidentally dropped on them.
- Uneven Surface: The presence of grout lines can result in a slightly uneven surface, which may not be as smooth as other countertop materials.
- Limited Seating Comfort: Sitting or leaning on tile countertops for extended periods may not be as comfortable as surfaces with softer edges.
- Cold and Hard Feel: The hardness of tiles can make them less comfortable to work on for extended periods, particularly in comparison to materials with more natural give.
- Potential Staining: Porous or unsealed tiles can absorb liquids, potentially leading to staining if spills are not cleaned up promptly.
- Seam Visibility: Depending on the tile layout and design, the seams between tiles may be visible, which can impact the overall aesthetic.
- Installation Complexity: While DIY installation is possible, achieving a professional-looking result may require a level of skill and precision that not all homeowners possess.
- Limited Heat Retention: While tiles are heat resistant, they don’t retain heat as well as materials like granite or quartz, which can impact keeping cooked food warm.
Some of these problems can be mitigated through proper maintenance, careful installation, and thoughtful design choices.
Installing Tile Countertops
While it does require careful planning and attention to detail, the steps involved are manageable for those with basic DIY skills. Here’s a step-by-step guide to help you navigate the installation process:
1. Preparation
- Measure and plan: Measure your countertop area accurately and calculate the number of tiles and materials needed, accounting for any cuts or waste.
- Choose tile material: Select the type of tiles you want to use. Consider factors such as material, size, and color, keeping in mind your kitchen’s overall design.
- Gather materials: Acquire the necessary tools, including tiles, tile adhesive, grout, tile spacers, a notched trowel, a tile cutter, a wet saw (if needed), and safety equipment.
2. Surface Preparation
- Clear the countertop: Remove any existing countertop materials and clean the surface thoroughly to ensure a smooth and clean base.
- Apply backer board: If your existing surface isn’t suitable for tiling, install a cement backer board to create a stable and even substrate for the tiles.
3. Layout and Design:
- Dry-fit tiles: Arrange the tiles on the countertop without adhesive to visualize the layout and ensure they fit well. Make any necessary adjustments.
- Plan tile placement: Decide on the tile arrangement, including patterns and design features. Consider starting from the center and working outward.
4. Tile Adhesive Application
- Apply adhesive: Use a notched trowel to spread a layer of tile adhesive over a small section of the countertop.
- Place tiles: Press each tile firmly into the adhesive, using tile spacers to maintain consistent gaps between tiles.
5. Grouting
- Wait for adhesive to set: Allow the adhesive to cure according to the manufacturer’s instructions before moving on to grouting.
- Mix grout: Mix grout according to the package instructions, ensuring a smooth and consistent texture.
- Apply grout: Use a rubber float to press the grout into the spaces between the tiles at a 45-degree angle. Work diagonally to prevent pulling grout out from the joints.
6. Cleaning and Sealing
- Clean excess grout: After the grout has set for a while, use a damp sponge to wipe away excess grout from the tile surfaces and smooth the grout lines.
- Allow grout to cure: Let the grout cure for the recommended time before proceeding.
- Apply sealer: Apply a grout sealer to protect the grout lines from moisture and staining.
7. Final Touches
- Remove spacers: Gently remove the tile spacers, being careful not to disturb the grout.
- Clean tiles: Give the tiles a final cleaning to ensure they’re free of grout residue and smudges.
Remember, while DIY installation is possible, some homeowners opt to hire professional tile installers for more complex designs or to ensure the best outcome. Proper installation practices and attention to detail will result in a beautifully tiled countertop that enhances the functionality and visual appeal of your kitchen space.
Maintenance and Care Tips for Tile Countertops
Taking care of your tile countertops ensures they stay looking their best for years to come. Here are some practical tips to keep them in top-notch condition
- Regular Cleaning: Wipe down the tiles regularly with a damp cloth or sponge to prevent dirt and grime buildup.
- Avoid Abrasive Cleaners: Steer clear of abrasive cleaners or scouring pads that could scratch the tiles or erode the grout.
- Use Mild Cleaning Solutions: Opt for mild, non-abrasive cleaning solutions. A mixture of water and a few drops of dish soap often does the trick.
- Grout Maintenance: Keep the grout lines clean by scrubbing them gently with a soft brush or an old toothbrush. If stains persist, consider using a grout cleaner.
- Seal the Grout: Apply a grout sealer periodically to protect the grout from moisture and stains. Follow the manufacturer’s recommendations for frequency.
- Promptly Address Spills: Wipe up spills as soon as they happen to prevent liquids from seeping into the grout lines or staining the tiles.
- Avoid Harsh Chemicals: Steer clear of harsh chemicals that could damage the tiles or grout. This includes bleach and acidic cleaners.
- Use Cutting Boards: While tiles are durable, it’s a good idea to use cutting boards to protect them from scratches caused by knives or sharp objects.
- Hot Pads and Trivets: Use hot pads or trivets when placing hot pots, pans, or dishes on the tile surface to prevent potential heat damage.
- Regular Inspections: Periodically check for loose or cracked tiles and address them promptly to prevent further damage.
- Avoid Impact: Be cautious not to drop heavy objects onto the tile surface, as this could cause chipping or cracking.
- Reapply Sealer: Over time, the grout sealer may wear off. Reapply sealer as needed to maintain its protective qualities.
Cost Analysis of Tile Countertops
One of the standout advantages of tile countertops is their budget-friendly nature, making them an attractive option for homeowners looking to transform their kitchens without breaking the bank. Here’s a breakdown of the cost considerations associated with tile countertops:
- Tile Material: The cost of tile material can vary greatly depending on factors such as the type of tile (ceramic, porcelain, natural stone), brand, and design complexity.
- Installation Labor: If you’re hiring a professional to install the tiles, labor costs will be an additional expense. DIY installation can save on labor costs but may require investing more time and effort.
- Additional Materials: In addition to the tiles, you’ll need to budget for tile adhesive, grout, spacers, and other installation materials.
- Tools: If you’re opting for DIY installation, consider the cost of tools such as a tile cutter, notched trowel, rubber float, and safety equipment.
- Design Complexity: Elaborate tile patterns or intricate designs may require more tiles, increasing material costs and potentially affecting labor costs as well.
- Size of Countertop: The size of your countertop directly influences the number of tiles required, impacting the overall cost.
- Maintenance Costs: While tile countertops are generally low maintenance, factoring in the occasional resealing of grout lines is essential to preserve their appearance.
Comparatively, tile countertops often offer a more affordable option than premium materials like granite or quartz. However, it’s important to remember that costs can vary significantly based on individual preferences, chosen materials, and whether you opt for professional installation or a DIY approach.
To get an accurate estimate of costs, consider obtaining quotes from suppliers for both materials and installation services.
Here are four online retailers where you can explore and compare tile options:
Keep in mind that investing in quality tiles and proper installation can enhance the longevity and overall value of your tile countertops.
Conclusion
In the symphony of kitchen remodeling options, tile countertops emerge as a harmonious blend of affordability, versatility, and resilience. With their endless palette of designs and patterns, they invite creativity into your culinary space.
Whether you’re a seasoned DIY enthusiast or a homeowner seeking an elegant yet cost-effective upgrade, tile countertops stand ready to tell your kitchen’s story, providing a durable canvas for life’s countless moments and memories.